Clay Magic Eye Painting Pictorial by Julie Fulton
<< Download Adobe Acrobat Printer Friendly Version >>
Clay Magic™
Eye Painting Instructions
Eye Painting Tips
Brush quality, VERY IMPORTANT!!
Use good quality brushes that are in excellent condition. Poor quality brushes or good brushes in fair condition will only frustrate you when painting eyes. A good brush and liner will do most of the work for you, really!!
Take care of your good brushes
Always wet your brush before placing your brush in the paint. Do not let the paint dry on your brush and do not leave your brush in the water. Clean your brush out frequently with water while painting by swishing the paint out of the brush in your water container. If you are finished with your brush or continue with a different brush, lay your clean brush flat on a paper towel or flat surface, not distrubing the bristles.
Do not let the paint dry on your brush. This is especially easy to do on fine liners because there are few hairs on liner brushes and it doesn't take long for the paint to dry on them. Before inspecting your work and in between every few eyelashes, rinse out your brush!!
Brush Size
Use the appropriate size round mock sable brush to paint the white, iris and pupil of the eye. If the eye is very small you will use your fine liner to paint all areas of the eye. Even a medium to smal eye can be painted entirely with a liner by loading the brush with paint and pushing the color around with the brush.
Glazed Tile Palette - Place the color on a glazed tile, add fresh color when necessary.

Supplies Needed - Fine liner, small round mock sable, clean water, glazed tile and desired iris color, Black and White. In our instruction we will be using Bright Blue for our iris color.

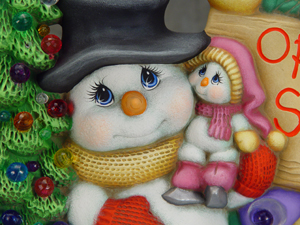
Your piece is finished, except for the eyes. It is important to paint eyes well and everyone can paint eyes well with enough practice and touch up when necessary. You can do it!!
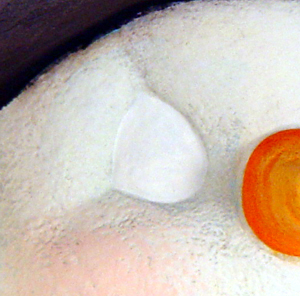
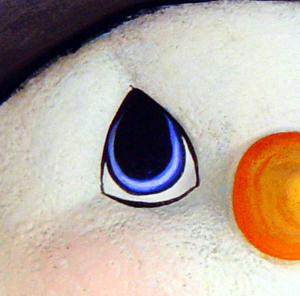
Paint the entire surface of the eye White, stay within the eye's border. You can add an extra coat at the bottom of the eye or where the white will be seen. Allow to dry.
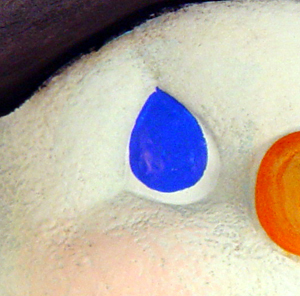
Paint the iris with Bright Blue as shown, if it is not perfect you can repair it at various stages, leave it for now.
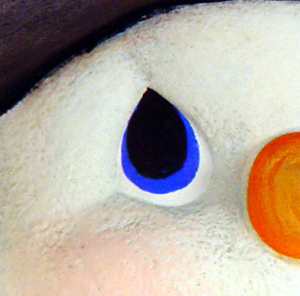
Paint the pupil with Black as shown, again if it is not perfect you can repair it at a later stage.

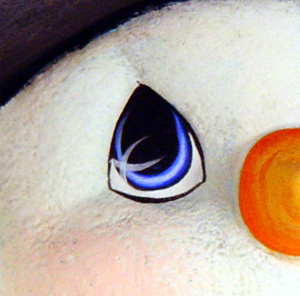
Eye Lining - Place a dab of Black color on a glazed tile. Wet your fine liner. With your brush grab a small dab of Black and move it to another section of your title near the original Black dab. Again using your brush add water to the smaller black dab. Mix the water with the Black color gently until the color flows evenly and smoothly off your brush and is giving you fine flowing lines. Realizing the color will dry on your brush if given too much time, line the border of the eye. If you run out of color, clean your brush and return to your small dab and reload your brush, it may be necessary to add more Black and more water to regain the right consistency, line the iris of the eye.
Repair - This is a good stage to repair eye painting mistakes. Use your fine liner to add color while removing color. Use White to thin heavy eye lining in the white area and Bright Blue to remove or clean up the pupil. Use Black, White or Bright Blue to even the eye out. You may even have to repair your repairs!

Add color/life to the iris - With your fine liner mix White with Bright Blue, adding water again for a good smooth flowing mixture and apply a single fine line of color in the center of the iris going up into the pupil.

Add more color/life to iris - Adding more White to your previous blue mixture and more water if necessary add a fine line of this color to the iris also.
Add White highlight to the iris - Using White only (with water added to flow smoothly), add a fine line in the bottom area of the iris.
Add a White "X" to the iris and pupil - Using White again, add a curved "X" to the eye making the cross connect between the iris and the pupil. Begin the "X" in the white of the eye so there are no start marks visible.
Add White dots of highlight - Using White at full strength, apply dots to where the "X" crosses and to the pupil as shown. You can add dots using the tip of your brush, toothpicks, ends of brushes, pencil tips or anything else that you can think of.
Lashes - This is where the brush does most of the work if you allow it. Thin your Black color down with water as described in the eye lining instructions. Begin with your brush in the pupil of the eye, hold your brush in a penciled position bracing your hand steady against the ceramic piece using a knuckle or a pinky finger. Using a slight hand and wrist movement, make the appropriate brushstroke letting your brush follow through. If you are unhappy with your first attempts at eyelashes, repaint the area and give it another try. Do this until you are happy with the results. Remember: Practice makes perfect!
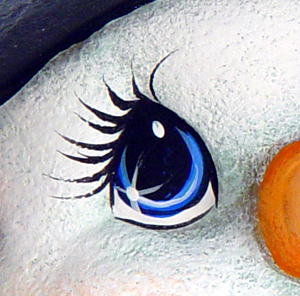
Finished - After many attempts or just one (depending on how much experience, practice or tenacity one has) we now have a piece with a pretty set of eyes!!